
Linux installation Guide
Note: This is an easy installation in which we will wipe the whole hard-drive's data, so if you have important stuff on your PC make sure to back it up by copying it to a USB or another hard drive.
1 - Requirements
1.1 - You only need three things to install Linux:
- A USB (in this specific case of 4GB of storage or more)
- The Linux ISO (image) you want to install
- A program to write the image into the USB
1.2 - And for this particular version of Linux we are going to install you need a computer with a 64-bit system (most PC's nowadays come with this architecture). Click here to learn how to check your system's architecture.
2 - Dowloading & Writing Image
2.1 -
To make things easy I uploaded the most recent version of the Linux Mint
Cinnamon Edition to Mega.
here you have a direct link to download it. (it is a bad practice to download software like this from third parties, the right thing to do would be to download it through the official site).
> If you want to download it through the official site just head to
this link.
>
click on Download to your preferred version (I recommend Cinnamon, but if
your PC is an absolutely pre-historic toaster you can pick Xfce).
>
If you have a torrent client you can use the "Torrent Download" link. if
not, just head down to the download mirrors and pick the one you think is
closest to your location. If this doesn't work just pick another one you
think might also be close.
2.2 - Head to
balena.io and click on
download (it should detect your system by default but if it doesn't just
click on the drop-down arrow on the right and pick your system).
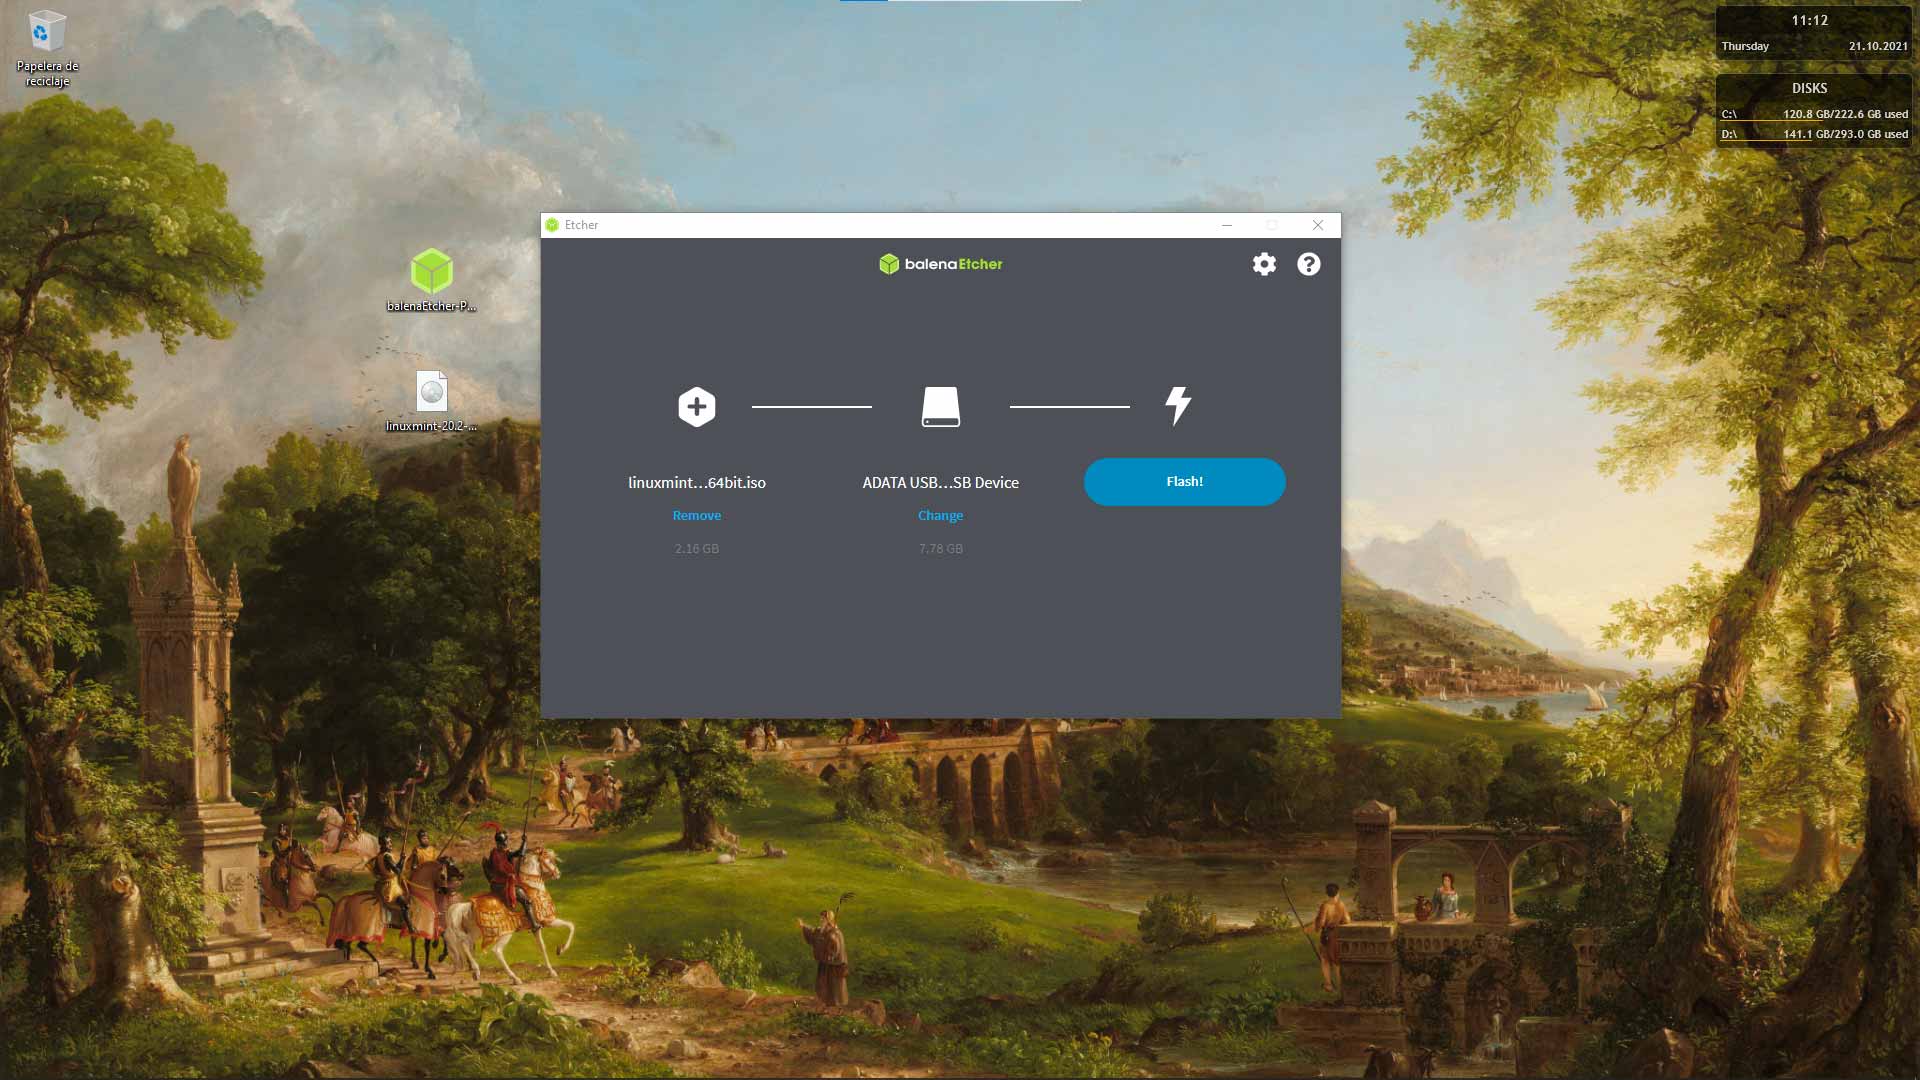
2.3 - Once you have downloaded both files head to the
location you downloaded Balena Etcher (usually your downloads folder) and
open the program.
> Click on select image and look for the Linux ISO
you just downloaded.
> Click on select target and check the USB drive you
want to write the image to.
> Select Flash Image. Now just wait a
bit, once it is done just close the program and extract the USB.
3 - Installing the OS
3.1 - Plug the USB into the PC
while it is turned off.
> then turn the PC on. On
startup, a text will appear for a few seconds telling you to press "x" key
(usually esc, del or Fsomething) to access either the BIOS menu or startup
menu, you need to press such key repeatedly while you are on that window.
(don't get pissed if you miss it, just turn off your computer and turn it
back on for the dialog to re-appear)
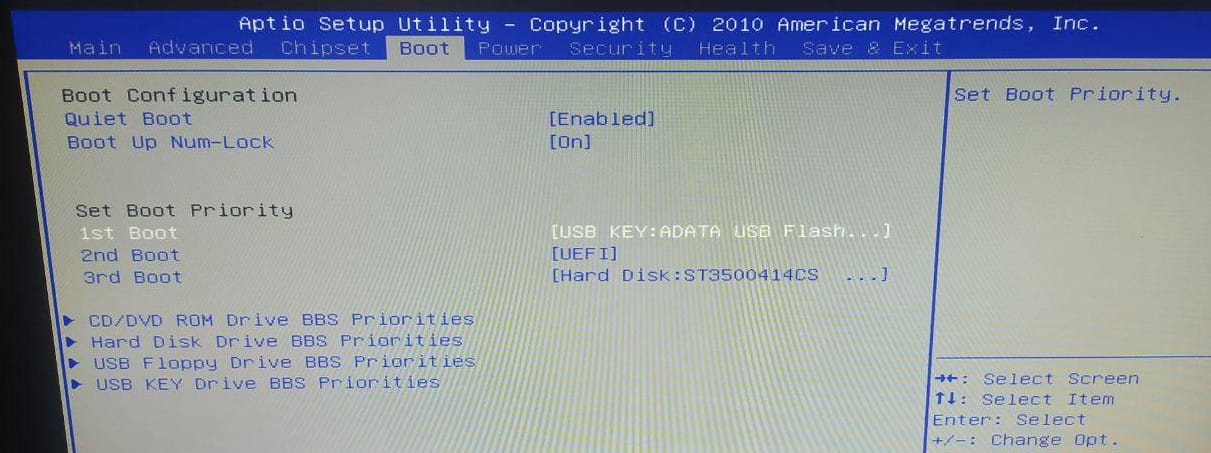
> Then a menu will appear and
in this menu you will look for the boot options and
select the USB as the primary boot (or it will allow you
to boot directly to it from that menu, that varies from PC to PC...) then
save and exit.
> Once the Linux Mint screen appears
just press enter to enter the Live session.
3.2 - Once the desktop loads fully, connect it to the
internet either via wi-fi or throught an ethernet cable (<-- this is
optional), then click on the Install Linux Mint icon at the top left. It
will prompt you to pick:
> language
> keyboard layout (you can test and even detect this automatically)
> Install extra codecs (optional but recommended, needs internet connection)
> Now the Installation options will appear. For the sake of simplicity we
are going with the option "Erase disk and install Linux Mint" which will
DELETE ALL OF THE DISK'S DATA and install Linux Mint
(later I'll add in here a tutorial on the last option which is the more
advanced, manual version with which you can pick what to delete and what
to keep).
When the prompt saying that it will wipe all
the disk's data appears click yes/confirm.
> Select your timezone.
> Pick a name, username, PC name, and password. I suggest you leave the checkmarks as they come by default.
> Once it is done, a prompt will appear, choose the "Restart Now" option.
It then will instruct you to remove the USB to proceed with the reboot.
And Done. You have successfully installed Linux Mint!
Here you have a quick video overview of the system and some basic stuff
you may like to know.
--- Metadata ---
Categories: TECH